Accoustic Guitar Google

Friday, April 29, 2011

Day 7

So as I explained on Day 6 the guitar mould is out of square and as this is the former for the guitar itself I am going to have to square it off now or I will just create a bigger problem during the build itself.

Out of square guitar mould
Ive got it now I need to make a sanding block which will sand at rightangles using the sides of the mould as a guide.  First of all I need some sanding blocks.

Sanding blocks

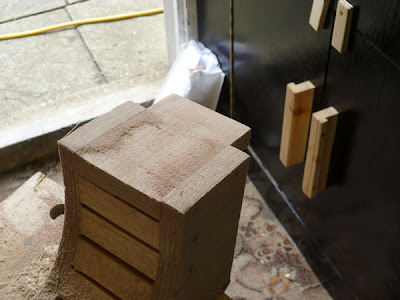
The sanding blocks have to be square but I have so many this size I just need to be selective about the ones I use.

Checking sanding blocks for square

The sanding blocks are glued to a piece of sandpaper with a weight placed on top to make sure the sandpaper is flat.

Sanding blocks glued to sandpaper

The idea is to glue a rounded piece of plywood to a flat piece of plywood, this should place the edge of the rounded plywood at right angles to the longer flat piece of plywood and  when sandpaper is placed on this edge it should sand at right angles to the vertical surface being used as a guide.  To make sure the rounded piece of plywood is at right angles to its own faces I have rigged up this jig so I can sand the edge using the sanding blocks prepared above.  The idea is to use the sanding block on its side on the lower piece of plywood and sand the rounded part producing a rounded part which will end up at right angles to the bigger piece.

Jig to sand rounded sanding block at right angles
That didnt work so now a different jig - two long pieces of softwood screwed to another piece of plywood spaced around a nother piece of plywood.  Under the two pieces of plywood is a strip of sandpaper.


Sanding jig number 2
Now the rounded plywood can be sanded - the softwood should keep the wood at right angles to its edges.

Sanding the rounded sanding block using jig 2

 The rounded sanding block is now attached to the longer plywood guide.  Glued and screwed.

Prepared rounded sanding block

The prepared sanding block ready to start being used.

Rounded sanding block ready to use

Now its time to test the block to see if it works by sanding the edges of the mould making sure the longer piece of plywood stays flat against the vertical surface to produce a right angle on the edge.

Re sanding edge of plywood mould


What do you know it worked - I have only done approx 1/6 of 1 hlf of the mould but it works.  Will carry on with the rest next time.

Finished squared off mould

Thats the end of day 7- this took another 6 hours thats 51 hours total so far.


Wednesday, April 27, 2011

Day 6

No pictures today this is just a repeat of day 5 for the other half of the guitar mould.

I found it easier to trim eacblock individualy today and then sanded the whole of the inside down so it is flush.  Sanded the two ends down so they are flush and the two halves mate together.

found two slight problems :-

1. The sides are not square in a couple of locations.
2. One of the ends has been placed at an angle so they are not flush.

Need to deal with both of these issues dont know how but I will come up with a plan.

Thats the end of day 6 I think - this took 6 hours thats 45 hours total so far.

Sunday, April 24, 2011

Day 5

All the spacers were positioned on day 5 - now they all have to be trimmed back to the correct profile.
 
This will involve trimming back with a chisel and then sanding back, lets let the pictures do the talking.
 
First we start with the chisel to take it as far back to the desired profile as possible.
 
Mould ready to be trimmed

Trimming mould

Still trimming the mould

Getting there

Still going

Finished trimming with the chisel

Now its time to start sanding the mould.

Sanding the mould

Still sanding the accoustic guitar mould

Finished sanding

Finished sanding

Sanding the end connection

The finished half of the mould

Another view of the finished mould
 
Thats the end of day 5 I think I have RSI  - this took 7 hours thats 39 hours total so far.

Day 4

Well a nice easy day today - after forming the mould yesterday all I have to do is insert glue and nail all the other spacers ready for sanding on day 5.

First the accoustic guitar mould as left on day 3.

Accoustic guitar mould

Next place the first few spacers


The first spacers added
  More spacers added (note the nails securing temporarily)


More spacers added


All the spacers added to the accoustic guitar mould.

All the spacers placed

Both halves of the accoustic guitar mould together


Both halves together

Thats the end of day 4 all the hard work was done yesterday so thats 4 hours work today a total of 32 hours so far on the project.

Saturday, April 23, 2011

Day 3

 Day 3, we have cut out the template for the accoustic guitar and need to join it together with spacers but in its current form it will be very heavy so to make it lighter I will trim the corners making sure I have at least 75 mm of plywood at any 1 edge.


Trimmed accoustic guitar template stage 1


Trimmed accoustic guitar template stage 2


Trimmed accoustic guitar template stage 3


Trimmed accoustic guitar template stage 4


Trimmed accoustic guitar template stage Finished
 The next thing to do is cut the timber spacers which will form the edges of the accoustic guitar mould and the depth of the template.  These spacers are cut from 50 x 25mm softwood and are each 75mm long.  The spacers are cut on a mitre saw to keep them square. 


Cutting spacer blocks picture 1


Cutting spacer blocks picture 2


The two halves of the mould will have to be joined by two pieces of plywood which are also 75 mm high.

Plywood joining pieces picture 1


Plywood joining pieces picture 2

The spacers are arranged on the plywood template to make sure I have enough.


Spacer blocks arranged on mould

All that remains now is to glue the initial spacers in place on the template.  They are glued and nailed into position and left to dry overnight.  The spacers are set slightly proud of the edges to be trimmed back later.


Spacers in position


Top half of mould in position

Both sections with initial spacers in position

Now the two halves are placed alongside each other - its actually guitar shaped and even though I still havent started making the actual guitar it is still quite satisfying.

The two halves of the mould together
Thats the end of day 3 and whilst it looks quite simple and easy thats 12 hours work today a total of 28 hours so far on the project.

Tuesday, April 19, 2011

Day 2

So day two of the accoustic guitar build you have seen what I have been doing on day 1, it took a little longer than I expected, still time to go for day two.

Well thats the guitar template made just need to transfer this to the wood for the mould.  Laid the accoustic guitar temp. on top of the timber and traced around it.


Plastic accoustic guitar template on timber

 Here we have two pieces of timber with the accoustic guitar shape transfered to it.

Accoustic guitar shape transfered to timber
 The next thing was to cut the inside shape of the guitar from the timber (roughly - it can be sanded back later) in readiness to make the negative for the accoustic guitar.

Accoustic guitar template cut roughly with jigsaw
 The four pieces which will eventually form the negative for the guitar body need to be sanded back to form the guitar mould and they all need to be the same shape.  The easiest way to do this was to bolt them together.

Accoustic guitar mould sections bolted together

In the past and before I had read Jonathan Kinkead's book I would have sanded something down with a block of wood wrapped in sandpaper.  Jonathan's book introduced me to sanding sticks - something I had never considered before.  A sanding stick is a shape of wood with sandpaper glued to it to make it a sanding tool.  There is not a lot of need for text here so I will let the pictures do the talking.


Guess what I'm using for a round sanding stick dont tell the wife


A Flat sanding stick


Glue on flat sanding stick


Sandpaper glued to sanding stick
 Sanding sticks ready it is time to start sanding the guitar mould back to the profile we require as the current profile is very irregular.

Accoustic guitar template ready for sanding
 After a lot of hard work with both the flat and round sanding sticks we are half way to producing the guitar blank.(three hours worth).
Half way through sanding process
 Heres a couple of shots of the sanding tools in action on the guitar blank - again not a lot of need for words apart from the titles of the pictures.

Flat sanding tool in action

Round sanding tool in action
 And after another three hours we are nearly there.

Nearly finished
 And now its finished and yes I have gat carpet in my workshop.

Finished sanding the template - lines marked to trim the mould

Another picture of the finished mould template pieces
 One last thing if you are cutting things out on your workbench with a jigsaw, remember the bench is underneath.  Here's a picture of a semi circular chunk I took out of the bench (in the centre) thankfully it looks like it may have been intended to be there.

Dont forget when your using your jigsaw dont cut through your bench

The end of day 2 another 8 hours work so thats 16 hours on the project so far.